前言
最近拿到一个电路绘制的需求,这我可太擅长了(不是),毕竟转行码代码之前就是画电路图的啊。需求与常用的电路绘制软件一致,就是将Toolbar上的电子元器件拖拽到画图上,然后玩一玩连连看,最后再将电路数据按照固定的格式输出即可。
做这种需求使用QGraphicsView那一套简直太舒服了,当然可能也有大佬选择用QPainter手搓。。。QGraphicsView提供了图元的各种操作,移动,旋转,放大缩小,并且QGraphicsView 有着专门对付这种场景的缓存机制和绘图机制,即使图元达到几千个也可以做到操作时不卡顿(往上就没有试过了。。),总之就是你了。
一个简单的示例
先直接贴一个再了解的过程中用于测试的demo。
#include <QApplication>
#include <QGraphicsScene>
#include <QGraphicsView>
#include <QGraphicsEllipseItem>
#include <QGraphicsLineItem>
#include <QGraphicsPathItem>
#include <QGraphicsPolygonItem>
#include <QGraphicsRectItem>
#include <QGraphicsLineItem>
#include <QGraphicsSimpleTextItem>
#include <QGraphicsPixmapItem>
#include <QGraphicsItemGroup>
#include<QString>
template <typename Item >

class GraphicsItem:public Item{
public:
   using Item::Item;
    void setName(const QString& name){
        this->name = name;
        this->setToolTip(name);
        init();
    }
    void init(){
        //使item可以被选择
        this->setFlag(QGraphicsItem::ItemIsSelectable);
        //使item可以移动
        this->setFlag(QGraphicsItem::ItemIsMovable);
        //item可以响应鼠标事件
        this->setAcceptHoverEvents(true);

    }
protected:
    void paint(QPainter *painter, const QStyleOptionGraphicsItem *option,
               QWidget *widget) override{
        Item::paint(painter,option,widget);
        if(hover)
            painter->setPen(QPen(Qt::red));
        QRectF rect = this->boundingRect();
        painter->drawText(rect.x(),rect.y() + rect.height() + 20,name);
    }
    void hoverEnterEvent(QGraphicsSceneHoverEvent *event) override{
        Item::hoverEnterEvent(event);
        hover = true;
        //更新item所在的矩形框种的图形
        QRectF rect = this->boundingRect();
        rect.setHeight(rect.height()+ 20);
        this->scene()->update(rect);
    }
    void hoverLeaveEvent(QGraphicsSceneHoverEvent *event) override{
        Item::hoverLeaveEvent(event);
        hover = false;
        //更新item所在的矩形框种的图形
        QRectF rect = this->boundingRect();
        rect.setHeight(rect.height()+ 20);
        this->scene()->update(rect);
    }
private:
    QString name;
    bool hover = false;
};

int main(int argc, char *argv[])
{
    QApplication a(argc, argv);

    QGraphicsView * view = new QGraphicsView();
    QGraphicsScene* scene = new QGraphicsScene();
    view->setScene(scene);
    //左键点击拖动时显示选择框
    view->setDragMode(QGraphicsView::RubberBandDrag);

    //ellipseItem
    int x = 20;
    auto ellipseItem = new GraphicsItem<QGraphicsEllipseItem>(x,20,80,80);
    ellipseItem->setName("ellipseItem");
    scene->addItem(ellipseItem);
    x+=140;

    //painterPathItem
    QPainterPath path;
    path.addRect(x, 20, 80, 80);
    path.addEllipse(x,20,80,80);
    auto painterPathItem = new GraphicsItem<QGraphicsPathItem>(path);
    painterPathItem->setName("painterPathItem");
    scene->addItem(painterPathItem);
    x+=140;

    //PolygonItem
    QPolygon polygon;
    polygon << QPoint(x,20) << QPoint(x+80,60) << QPoint(x+80,100) << QPoint(x+40,100) << QPoint(x,20);
    auto polygonItem = new GraphicsItem<QGraphicsPolygonItem>(polygon);
    polygonItem->setName("polygonItem");
    scene->addItem(polygonItem);
    x+=140;

    //rectItem
    auto rectItem = new GraphicsItem<QGraphicsRectItem>(x,20,80,80);
    rectItem->setName("rectItem");
    scene->addItem(rectItem);
    x+=140;

    //lineItem
    auto lineItem = new GraphicsItem<QGraphicsLineItem>(x,20,x+80,100);
    lineItem->setName("lineItem");
    scene->addItem(lineItem);
    x+=140;

    //textItem
    auto textItem = new GraphicsItem<QGraphicsSimpleTextItem>("hello world");
    textItem->setPos(x,90);
    textItem->setName("textItem");
    scene->addItem(textItem);
    x+=140;

    //pixmapItem
    QPixmap pixmap("C:/Users/Administrator/Desktop/临时图片/犬夜叉头像.jpg");
    auto pixmapItem = new GraphicsItem<QGraphicsPixmapItem>(pixmap);
    pixmapItem->setScale(80.0/pixmap.height());
    pixmapItem->setPos(x,20);
    pixmapItem->setName("pixmapItem");
    scene->addItem(pixmapItem);
    x+=140;

    //itemGroup
    auto itemGroup = new GraphicsItem<QGraphicsItemGroup>();
    itemGroup->setName("itemGroup");
    auto subItem1 = new GraphicsItem<QGraphicsRectItem>(x,20,80,80);
    subItem1->setName("subItem1");
    itemGroup->addToGroup(subItem1);
    x+=140;
    auto subItem2 = new GraphicsItem<QGraphicsEllipseItem>(x,20,80,80);
    subItem2->setName("subItem2");
    itemGroup->addToGroup(subItem2);
    scene->addItem(itemGroup);
    x+=140;

    view->show();
    return a.exec();
}
运行结果:

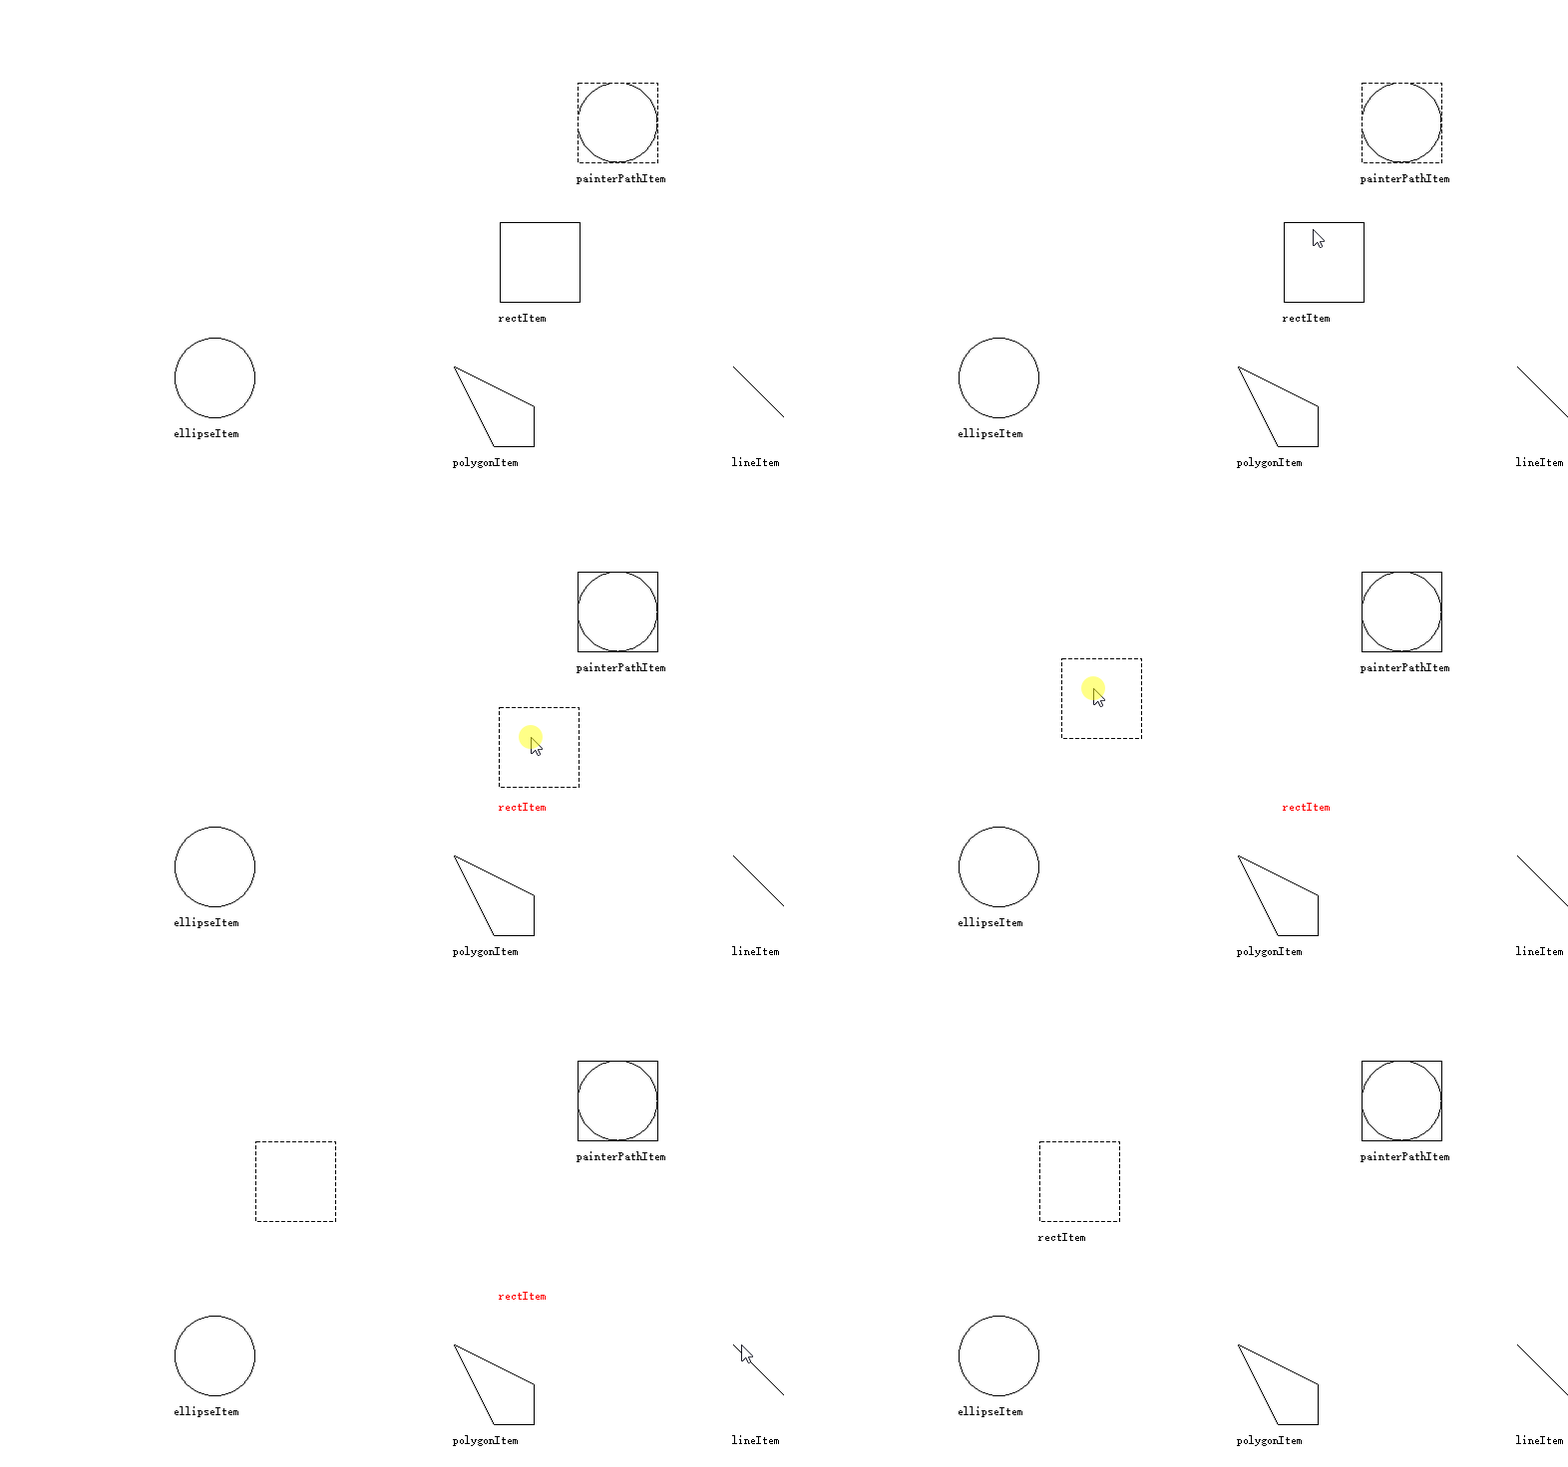
简单的尝试了QGraphicsItem提供的几种基本类型的图元,然后尝试了一下拖动、选择、以及鼠标事件的触发,这就是上述代码做的事情了。
结构
要使用QGraphics 主要是要用到三个类:
- QGraphicsView
- QGraphicsScene
- QGraphicsItem
分别对应的是 视图、场景、图元。使用时也只需要为view添加一个scene,然后再scene中添加item,就可以将item显示到view中了。
Item
QT提供了几种基础的item类型
- QGraphicsEllipseItem 圆或者椭圆
- QGraphicsPathItem 路径绘制
- QGraphicsPolygonItem 多边形
- QGraphicsRectItem 矩形
- QGraphicsSimpleTextItem 文本图元
- QGraphicsPixmapItem 图片
- QGraphicsItemGroup 这个比较特殊,可以将多个item组合在一起使用,应该算是一个item容器
自定义Item
除了使用基础的Item组合成复杂的Item,也可以通过QPainter绘制自定义的图元,这个有点类似重写QWidget的paint Event 事件。
需要继承QGraphicsItem 然后重写两个虚函数:
    QRectF boundingRect() const override;

    void paint(QPainter *painter, const QStyleOptionGraphicsItem *option,
               QWidget *widget) override;
boundingRect()返回一个矩形来定义这个图元的边界。图元中的所有东西必须在这个矩形中,且不管图元是何种形状他的边界都将是一个矩形,这会被用于QGraphicsView的绘制,以及更新,在做测试的时候在更新绘制时就遇到了相关的问题,这里先按下不表。如果图元的边界发生了改变,还需要调用prepareGeometryChange()来更新边界信息。
paint()函数用于图元的绘制,会被QGraphicsView调用,绘制时使用view的本地坐标系。option参数提供绘制样式选项,widget参数是一个可选参数,一般来说是0,否则就是正在绘制的widget的指针。
在paint()中绘制的时候,需要特别注意,一定不要超出边界,需要注意画笔的宽度和style,有时候这些也会让绘制超出边界,导致一些奇怪的问题。
操作

这是测试demo的一个操作演示,主要是移动和选择。默认情况下这些操作是被禁用的,需要通过调用setFlag()函数来开启这些功能,操作相关的flag有以下
| Constant | Value | Description |
|---|---|---|
QGraphicsItem::ItemIsMovable |
0x1 |
item是否可以被移动,如果可以移动,那么所有的child也会跟着一起移动 |
QGraphicsItem::ItemIsSelectable |
0x2 |
item是否可以被选中 |
QGraphicsItem::ItemIsFocusable |
0x4 |
item是否可以获得焦点,如果不能获取焦点那么将无法响应键盘事件。 |
QGraphicsItem::ItemClipsToShape |
0x8 |
The item clips to its own shape. The item cannot draw or receive mouse, tablet, drag and drop or hover events outside its shape. It is disabled by default. This behavior is enforced by QGraphicsView::drawItems() or QGraphicsScene::drawItems(). This flag was introduced in Qt 4.3. |
QGraphicsItem::ItemClipsChildrenToShape |
0x10 |
The item clips the painting of all its descendants to its own shape. Items that are either direct or indirect children of this item cannot draw outside this item's shape. By default, this flag is disabled; children can draw anywhere. This behavior is enforced by QGraphicsView::drawItems() or QGraphicsScene::drawItems(). This flag was introduced in Qt 4.3. |
后面两个不是很懂是干嘛用的。。
批量选中
如果需要gif中那种批量选中的功能,还需要在QGraphicsView中开启
setDragMode(QGraphicsView::RubberBandDrag);
视图更新
当item发生改变时,需要调用scene的update更新view中的显示,调用item的update()函数似乎没有作用,至少我尝试这样做没有成功。
void QGraphicsScene::update(qreal x, qreal y, qreal w, qreal h)
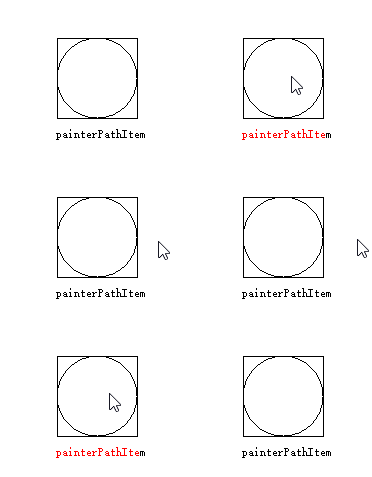
这个函数也可以update(QRectF(x, y, w, h))这样调用,它提供了一个矩形参数让用户传入,调用之后会只更新这个重绘这个矩形内的内容(这大概就是为啥它性能这么强吧),当然也可以不传参数调用,没有在官方文档上找到默认参数是啥,但是为了性能还是最好传入更新的部分。

这是demo的一部分,我在鼠标进入事件中改变了名称的显示颜色,然后更新了图元所在的矩形区域,可能我实在没有想到它的名称太长了,居然超出了边界,那么更新的时候就只更新了传入的矩形参数部分,所以就导致最后的m字母并没有变成红色。
关于view操作时的自动更新
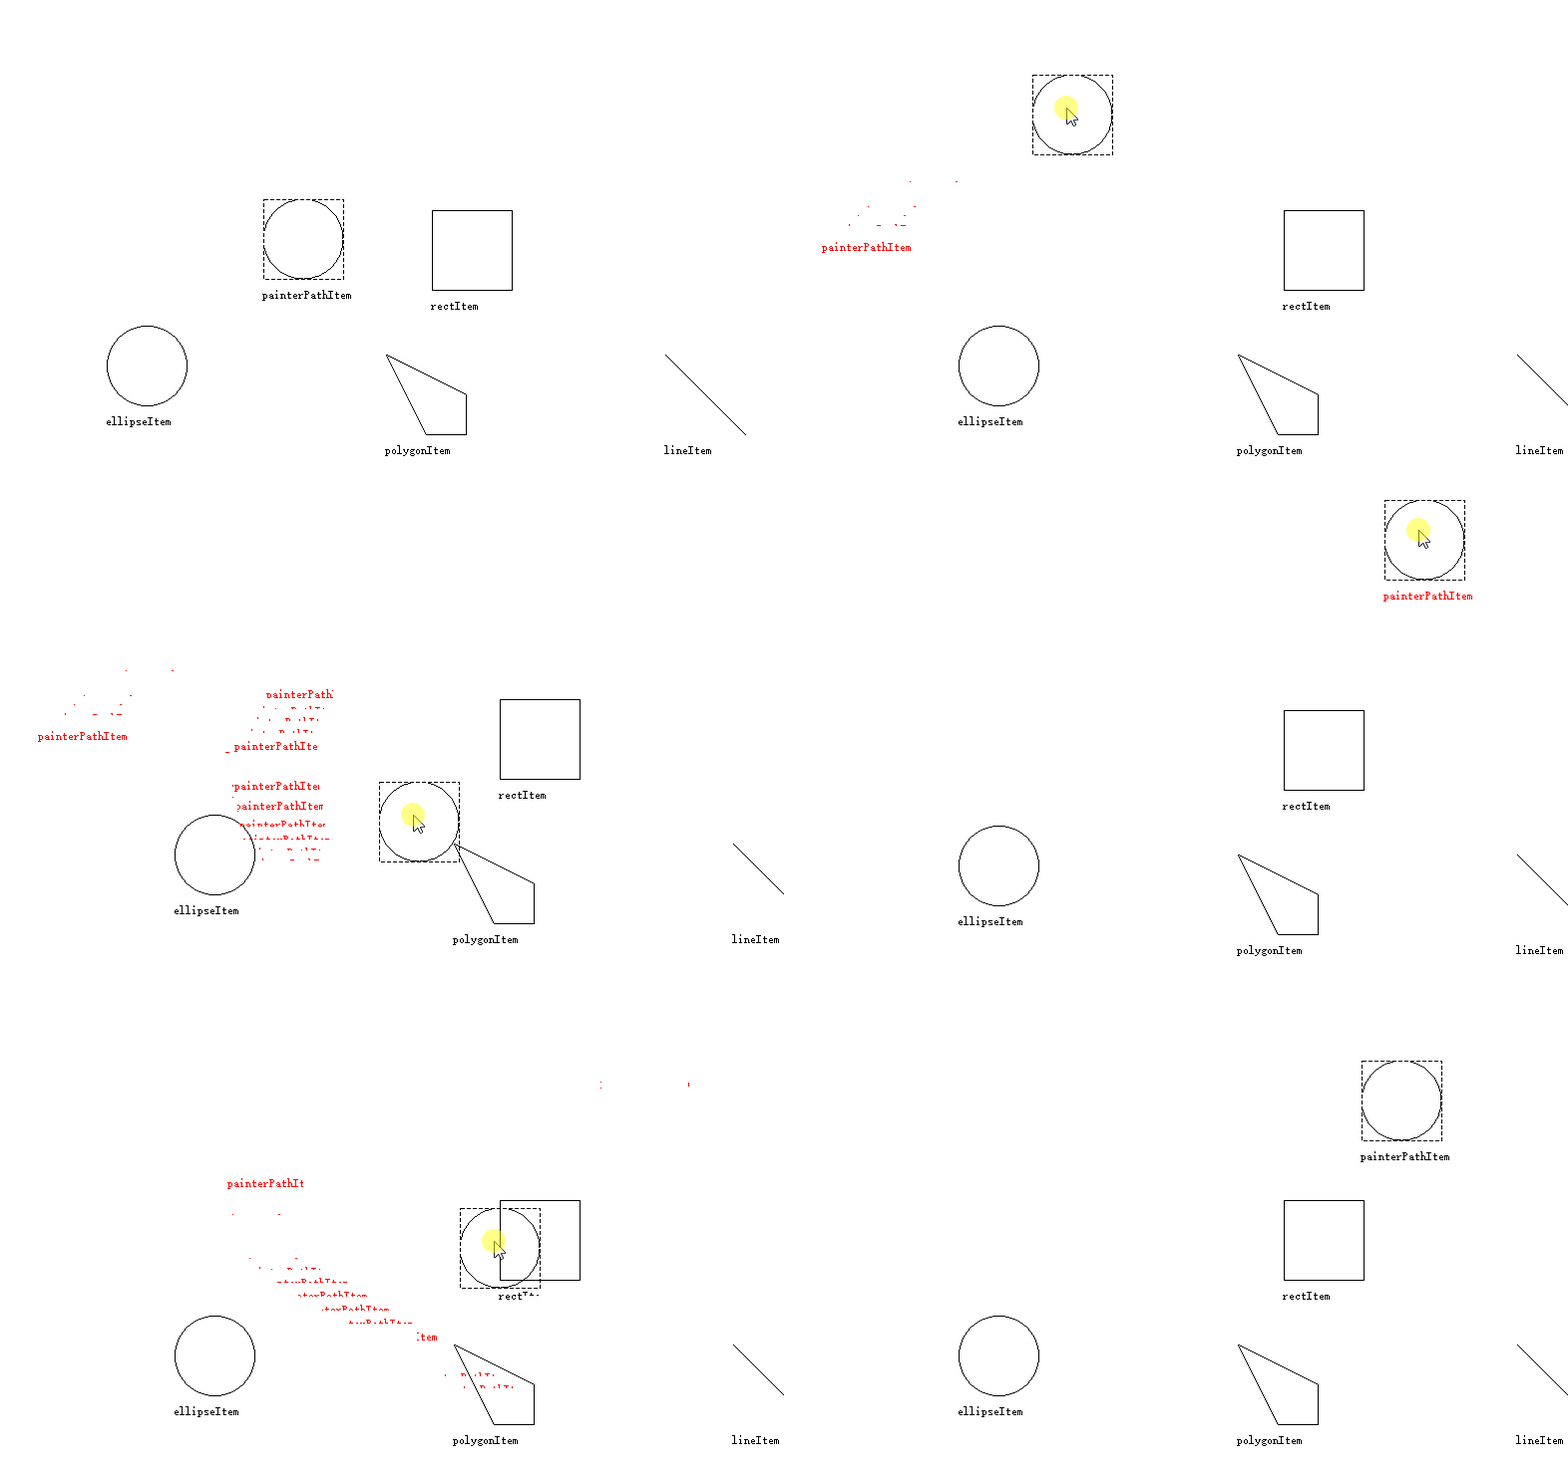
当我们在view中移动item时,view会自动选定区域来更新视图,从demo测试的现象来看也应该是通过调用item的boundingRect() 获得图元的边界,然后更新图元所在的矩形,于是乎就发生了这样的事情。


可以看到有两个问题,一个是快速移动时图元名称的残影,另一个时移动图元时名称并不会立即跟过去。
再来看我再模板中写的代码
    void paint(QPainter *painter, const QStyleOptionGraphicsItem *option,
               QWidget *widget) override{
        Item::paint(painter,option,widget);
        if(hover)
            painter->setPen(QPen(Qt::red));
        QRectF rect = this->boundingRect();
        painter->drawText(rect.x(),rect.y() + rect.height() + 20,name);
    }
~嗯,对的,我将名称绘制到边界外了,在自动更新的时候,并不会更新这些不在边界中的内容,不过从现象来看qt终究还是会定时(也许)或者是其他什么机制的刷新整个画布,不然名称应该会一致留在原来的位置才对。
事件传递
item如果想要接收到鼠标事件,需要在对item进行一些设置,因为这些事件都是默认关闭的,相关函数如下:
setAcceptHoverEvents(bool);
setAcceptTouchEvents(bool);
setAcceptedMouseButtons(Qt::MouseButtons);
键盘输入事件需要开启item可以获取焦点才可以触发。
似乎是个bug?
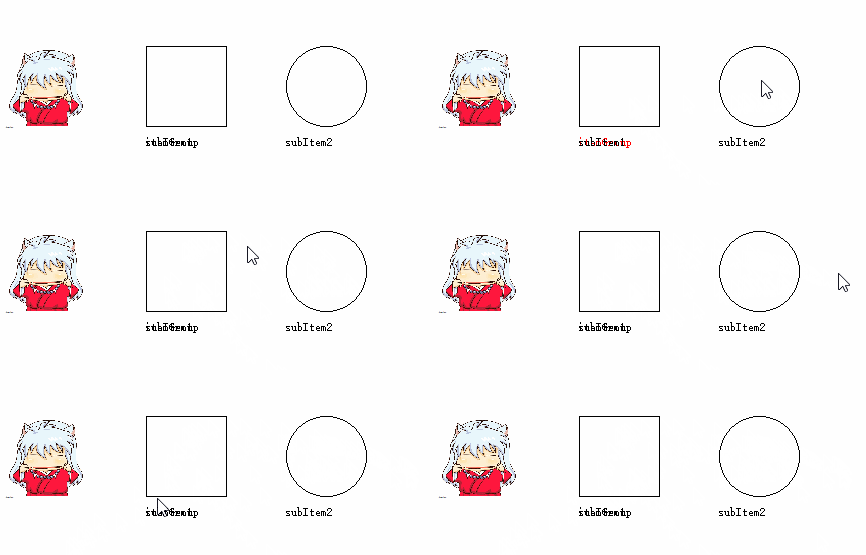
我在demo中测试的时候发现itemGroup 中的subItem不会触发鼠标进入和离开事件,只有itemGroup本身会触发,不知道是因为在代码里没有设置对,还是说这是一个bug?

这里可以看到的现象是只有itemGroup的名称有改变,并且似乎是用两个subItem的边界来判断进入的,也有可能本身就是这样设计的。
文章评论
批量选中的功能可以提供一份源码吗
@hand 开启这个函数
setDragMode(QGraphicsView::RubberBandDrag);
就可以实现批量选中的功能